12 Mar, 2008
 A few weeks ago, we looked at Ultra HAL Text to Speech reader. It had the ability to read out dialog boxes and to convert text documents to spoken word in the form of a wav file. It did the job reasonably well, but it had a few bugs and the reading of dialog boxes became annoying.
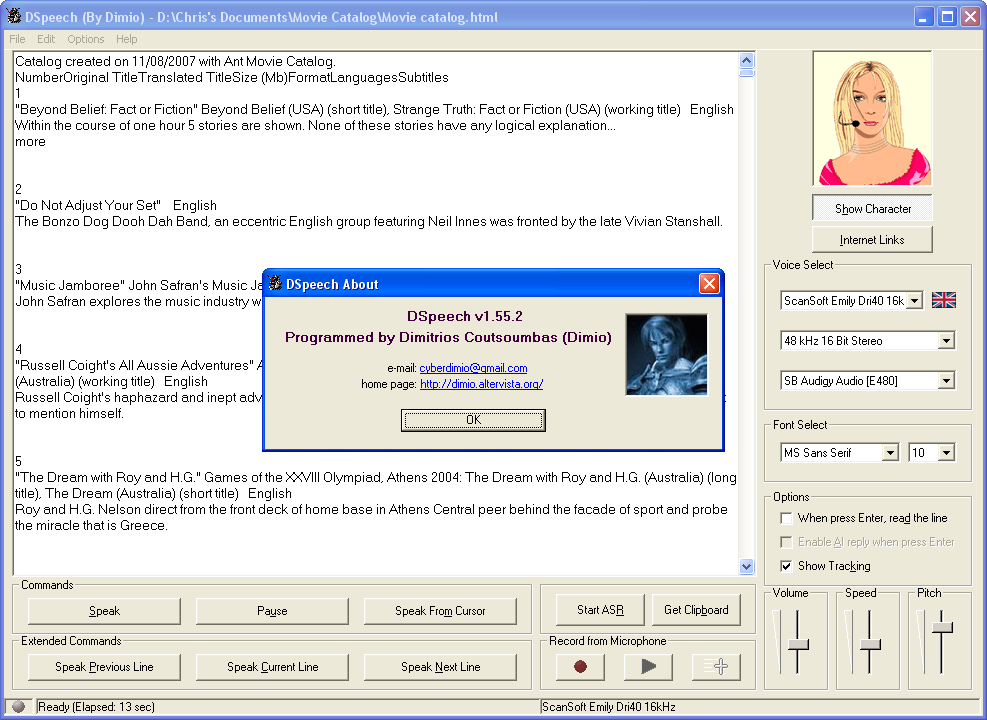
Since I wrote about it, I have come across another program that can convert your text files to MP3 files, and a whole lot more. DSpeech is a text to speech converter which can convert a wide variety of files to MP3, WAV or Ogg formats.
What makes DSpeech really special is that it supports PDF files, Microsoft doc files and web pages. This is much better than other programs as most I have come across that only support txt files and many of them cost money.
Another stand out point of this program is the ability to change the sound output quality. This allows the voices already on your computer to sound better, as most programs default them to a low setting. I like it that you can see the character talking up the top right of the screen. This can be turned on and off, but it is nice to look at, as each voice has its own individual face.
DSpeech is also capable of converting the audio from your microphone into text. There may be other programs that are better suited for this task, but it is nice to have all these features in the one package.
There are links on the site to some nice voices I had not come across before. They sound almost human and are quite understandable.
There is no installation required so you can try DSpeech out and delete it without any risk of damaging your system.
Get your copy for free from Dimio’s Tools. (Donations are welcome)
6 Mar, 2008
 Linux has a lot to offer. There are a huge range of programs for the KDE desktop that are nicer than their Windows counterparts. There are also a tonne of tiny utilities that perform specialist tasks.
The Windows KDE project will let you run programs written for KDE on your Windows Desktop. Once all of the libraries and files are installed, you can run the programs as if they were designed for Windows. There is no virtual computer or emulator you need to load up.
The installer is very simple to use. You can select what you want the installer to download and install. The Windows KDE project comes with a wide range of games and utilities that will get you started. The Amarok music player was a highlight for me. Additional programs can be added, but you will need to compile them, or wait for updates.
The project is still fairly young and is still in alpha phase, so there may be some stability problems. I did not come across any in my playing around with it. It worked really well. This is a project that I predict will become hugely popular in the coming years.
The Windows KDE project currently works on XP, 2000, 2003, with Vista support on its way shortly.
Get your copy from the KDE on Windows website.
25 Feb, 2008
 Here at Inspect My Gadget, we have looked at a number of programs that change your screen resolution quickly and easily. We have also looked at using these resolution changing programs in batch files so that an individual program can load at a certain resolution. This method works quite well, but I have just come across a program that is much tidier and efficient at achieving this.
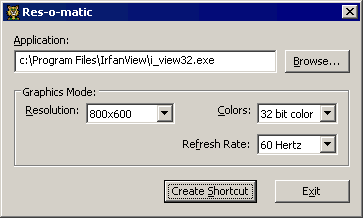
Res-o-matic is a utility that helps you to create shortcuts to any program, where you can define the resolution, colour depth and refresh rate you want the program to run at.
Res-o-matic couldn’t be any easier to use. It does all the hard work for you. I looked at the shortcut it had created, and its target is:
"C:\resomatic\reso.exe" "C:\WINDOWS\system32\calc.exe" 320 200 32 60
This example loads up Windows Calculator at 320×200 resolution with 32bit colour at 60Hz. When you launch the shortcut, there is no hint that Res-o-matic is working in the background. Closing the program down again will cause the resolution to return to its default values.
Res-o-matic will suck up a tiny 9kb of your hard drive. This program will certainly make my life easier. I need to run Vista Media Centre at 640×480 at 60hz. Up until now, batch files was the easiest way I knew how to do it in an automated process.
Res-o-Matic is available for free from bChecks Apps.
18 Feb, 2008
 Here at Inspect My Gadget, we have already shown you how to make shortcuts to change screen resolutions. Shortcuts are a very quick and efficient method to launch programs. We can take this much further and use shortcuts to perform a whole range of supposedly simple tasks.
NirCmd is a command line utility that looks after a huge range of tasks. Some of the things NirCmd can simplify for you include:
- Adjust volume, mute
- Turn off, log off, enter standby mode
- Change resolution
- Enable/disable screensaver
- Open/Close a CD drive tray
- And much more
The easiest way to set this up is to copy the program to the root of your C:, right click on the program and create a shortcut. You can then edit the shortcut with the necessary arguments. Check out the NirSoft website to find the arguments to achieve your desired task.
The formatting is similar to most other programs that allow for arguments. An example is below.
nircmd.exe monitor off
While shortcuts are a quick way to achieve any of these tasks, you could also use NirCmd in batch files. It would be a good way to set the volume of a music player on launch, or to disable the screensaver while watching a movie.
NirCmd may just spare you from that one niggling task, where you have had to go through various menus to get it to happen in the past.
NirCmd is available for free from NirSoft.
13 Feb, 2008
 Windows and Vista Media Centers are a great option for anyone wanting to turn their computer into a home theatre PC. Their interfaces look nice and they are easy to use. Get the most out of it by viewing all your music and pictures, or even schedule recordings, while you are away from home.
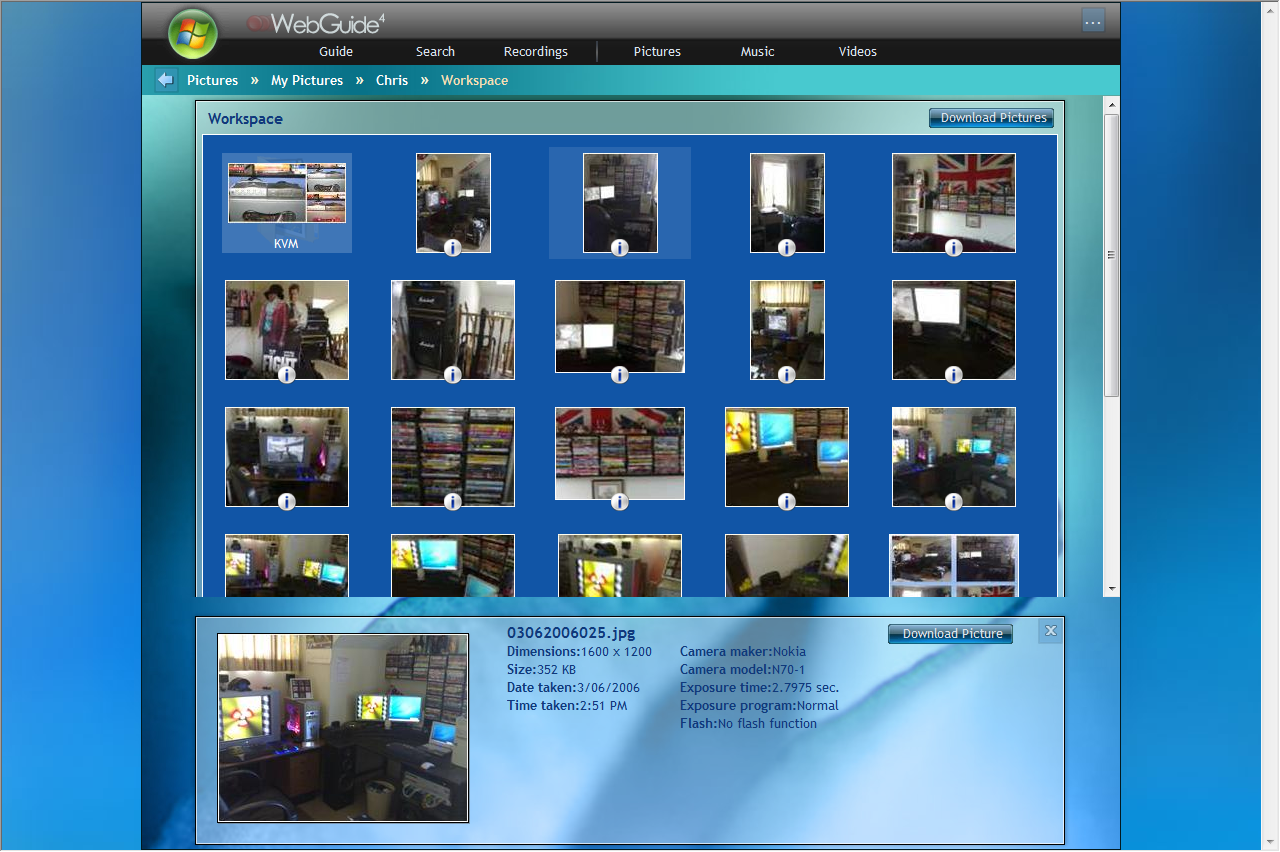
Having researched a number of programs designed for this task (and having very limited success with them) I had been using Remote Desktop to schedule recordings when I was away from home. That was until I read a detailed article from Lifehacker showing us the inner workings of Webguide. This article has plenty of helpful tips and screenshots to guide you through it.
Webguide is accessed through a web browser and delivers a powerful set of features. You are able to view pictures, stream music and movies. You can even remote control your Media Centre all through the web interface. My favourite feature would have to be the ability to schedule recordings while on the road.
Webguide was much easier to install than any of the other web control systems I have tried. There is no need to install Apache as Webguide comes with its own web server. It all works straight out of the box if you are using it on a local network.
Making it accessible from computers that are not on your local network is a bit more challenging. You will need to setup port forwarding and install IIS, but there are enough instructions available to get you going.
I recommend giving this one a go. I am already enjoying the freedom Webguide offers. I encourage you to read Lifehacker’s article in parallel with the FAQ of the Webguide website to make the install easier on you. And yes, of course Webguide is free.
 A few weeks ago, we looked at Ultra HAL Text to Speech reader. It had the ability to read out dialog boxes and to convert text documents to spoken word in the form of a wav file. It did the job reasonably well, but it had a few bugs and the reading of dialog boxes became annoying.