How-to: Repair a VHS tape

Difficulty: 2

Photo-vhsVHS tapes are not used as much as they used to be since the development of newer formats such as DVD’s, but many people still have them in their homes as they were often used to store family memories.

The Video Home System (VHS < who would of guessed) is still a very useful format. Many Radio stations use VHS for their pre recorded shows and the majority of recording studios which haven’t gone to hard drive recordings, still use S-VHS format to record their musicians.

The drawback of VHS is that the tapes can stick or break altogether. Sadly, this happens to the most watched videos, which you probably want to see again.

This article will look at how to repair a video. With the help of images in this article, you will be able to dissect one and put it back together. I wrote this article after repairing a video from when I was on TV at the age of 5, which I will finally be able to show my wife. The video has not been playable for many years.

Read the rest of this entry »


How-to: Remove annoying ad breaks from pre-recorded TV

LifextenderMany TV stations lift the volume of their ads to ridiculous levels. I wouldn’t mind ads if they were the same volume as the movie, but the stations have taken it too far, requiring watchers to fiddle with their remotes each time an ad break comes along.

If you have a Digital Video Recorder or Home Theatre PC, you may like to consider removing the ads from your recorded shows. This will save you time when you watch old recordings, and save you from the volume hikes.

I have played with a number of ad removal programs in the past, with limited to no success. It is not an easy task for any programmer to write software which will remove ads flawlessly. For it to be done well, it should look like it was easy.

Lifextender is a program which will remove ads from your recordings. I was sceptical when I first downloaded it, but then after recording a few shows and running Lifextender over them, I was really impressed. It worked! There was no manual work or switching between programs required. It looked after it all.

Lifextender sits in the tasktray or can be run manually. You can set it to scan your recorded shows at set times of the day or it can process them once the recording is complete. There are a whole heap of options available to you, but the default settings will suit most needs. I can’t understand why it is still in alpha phase of development. I came across no problems.

Lifextender can run as a Media Center plugin or as a stand-alone application. I have set it to run at 2:00am in the morning so that the processing doesn’t interfere with my general computer use.

Lifextender is available for free from cnet or Lifextender.com.


How-to: Connect your computer to a sound system

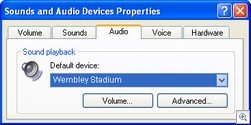
WembleyThere once was a time that we had to use a PC speaker to hear sound effects in games. Some games even offered small digitised voice effects, which we were impressed with at the time. The next stage was adlib soundcards which could handle midi sounds. They were still fairly weak, but they were a huge improvement on what we were once used to.

Since that time, soundcards have evolved into a very important feature in any computer. The sound quality which comes out of even the cheapest cards is good enough to listen to music or to watch a movie. Why not take full advantage of this technology and hook it up to your sound system to get your MP3’s pumping.

Current PC speakers on the market sound quite good, but they will never be able to recreate the awesome sound you can get out of your main sound system. It shouldn’t cost you more than a few dollars to setup. Even if you don’t want to set this up for permanent use, it is worth keeping in mind for parties as it will be appreciated by your guests. I haven’t bothered with PC speakers for years as it is easier for me to connect my computer to my sound system.

This article will show you how to connect your computers soundcard to your sound system. I have already written an article explaining “How-to: Connect your PC to your television and stereo”, but I placed a large emphasis on the video side of things and many of the comments are related to audio. This article will only cover audio. I hope you will be amazed how easy it is.

Read the rest of this entry »


How-to: Split your video signal to multiple monitors.

Difficulty: 1.5

TradeshowThere are many ways to replicate a signal across multiple monitors. Some methods work much better than others. The price difference varies greatly as well. The more money you spend, the more control you will have and the better your results will be.

Generally, there are not a great deal of consumer reasons for wanting to do this. It is much more suited for commercial trade shows where you have multiple screens all around a stall. The reason I looked into this was because I needed to split my signal between my TV and a second monitor.  

This article will explain some hardware options you can use to get from one video source, to multiple screens, replicating the same image on each screen. This is not a true dual screen setup.

Read the rest of this entry »


Windows Software: ResChange 3.11

Reschange

Most applications are best run at a high resolution to ensure you have plenty of screen space, however some games require you to change your screen resolution to a setting which the game supports.

To change your screen resolution, you would generally need to go into your display properties and tinker with a few settings. While this is easy enough to do occasionally, if it is something you want to do regularly, it becomes quite an annoying process. It gets even worse if you require low resolutions, as they are not always made available to you here. You would need to go further and enter into the advanced section of your display properties to switch between the resolutions.

I constantly need to switch between 1280×1024 and 640×480, as my CRT TV only supports the lower resolution. I used ResChange to setup some desktop shortcuts to make the job much quicker and easier. I can also see this being useful for a range of scenarios such as wide-screen laptops connecting to 16:9 projectors on a regular basis.

ResChange is a command line utility which will do as the name suggests, change your resolution. You can apply a whole range of switches such as height, width, frequency, as well as telling ResChange which monitor to do the change to if you have dual screen setup (defaults to monitor 1).

Once installed, I made shortcuts with the following switches:

For 640×480 I used
”reschange.exe” -width=640 -height=480 -refresh=60


For 1280×1024 I used
”reschange.exe” -width=1280 -height=1024 -refresh=max

While compatibility mode would allow me to run some things at the lower resolution, not all programs support it, so changing the resolution of Windows was best. This has worked flawlessly for me in both XP and Vista. If you need a range of resolutions, you could make a start menu group with multiple shortcuts for various resolutions in there.

(Update 4/8/08: This is now called Display Changer. There are some new features whcih make it even more handy.)

Available for free from Softpedia.